Overview
An Attachment step lets you share files with participants or request them to upload their own.This step is ideal for exchanging documents, images, contracts, or any resources needed to complete the workflow.
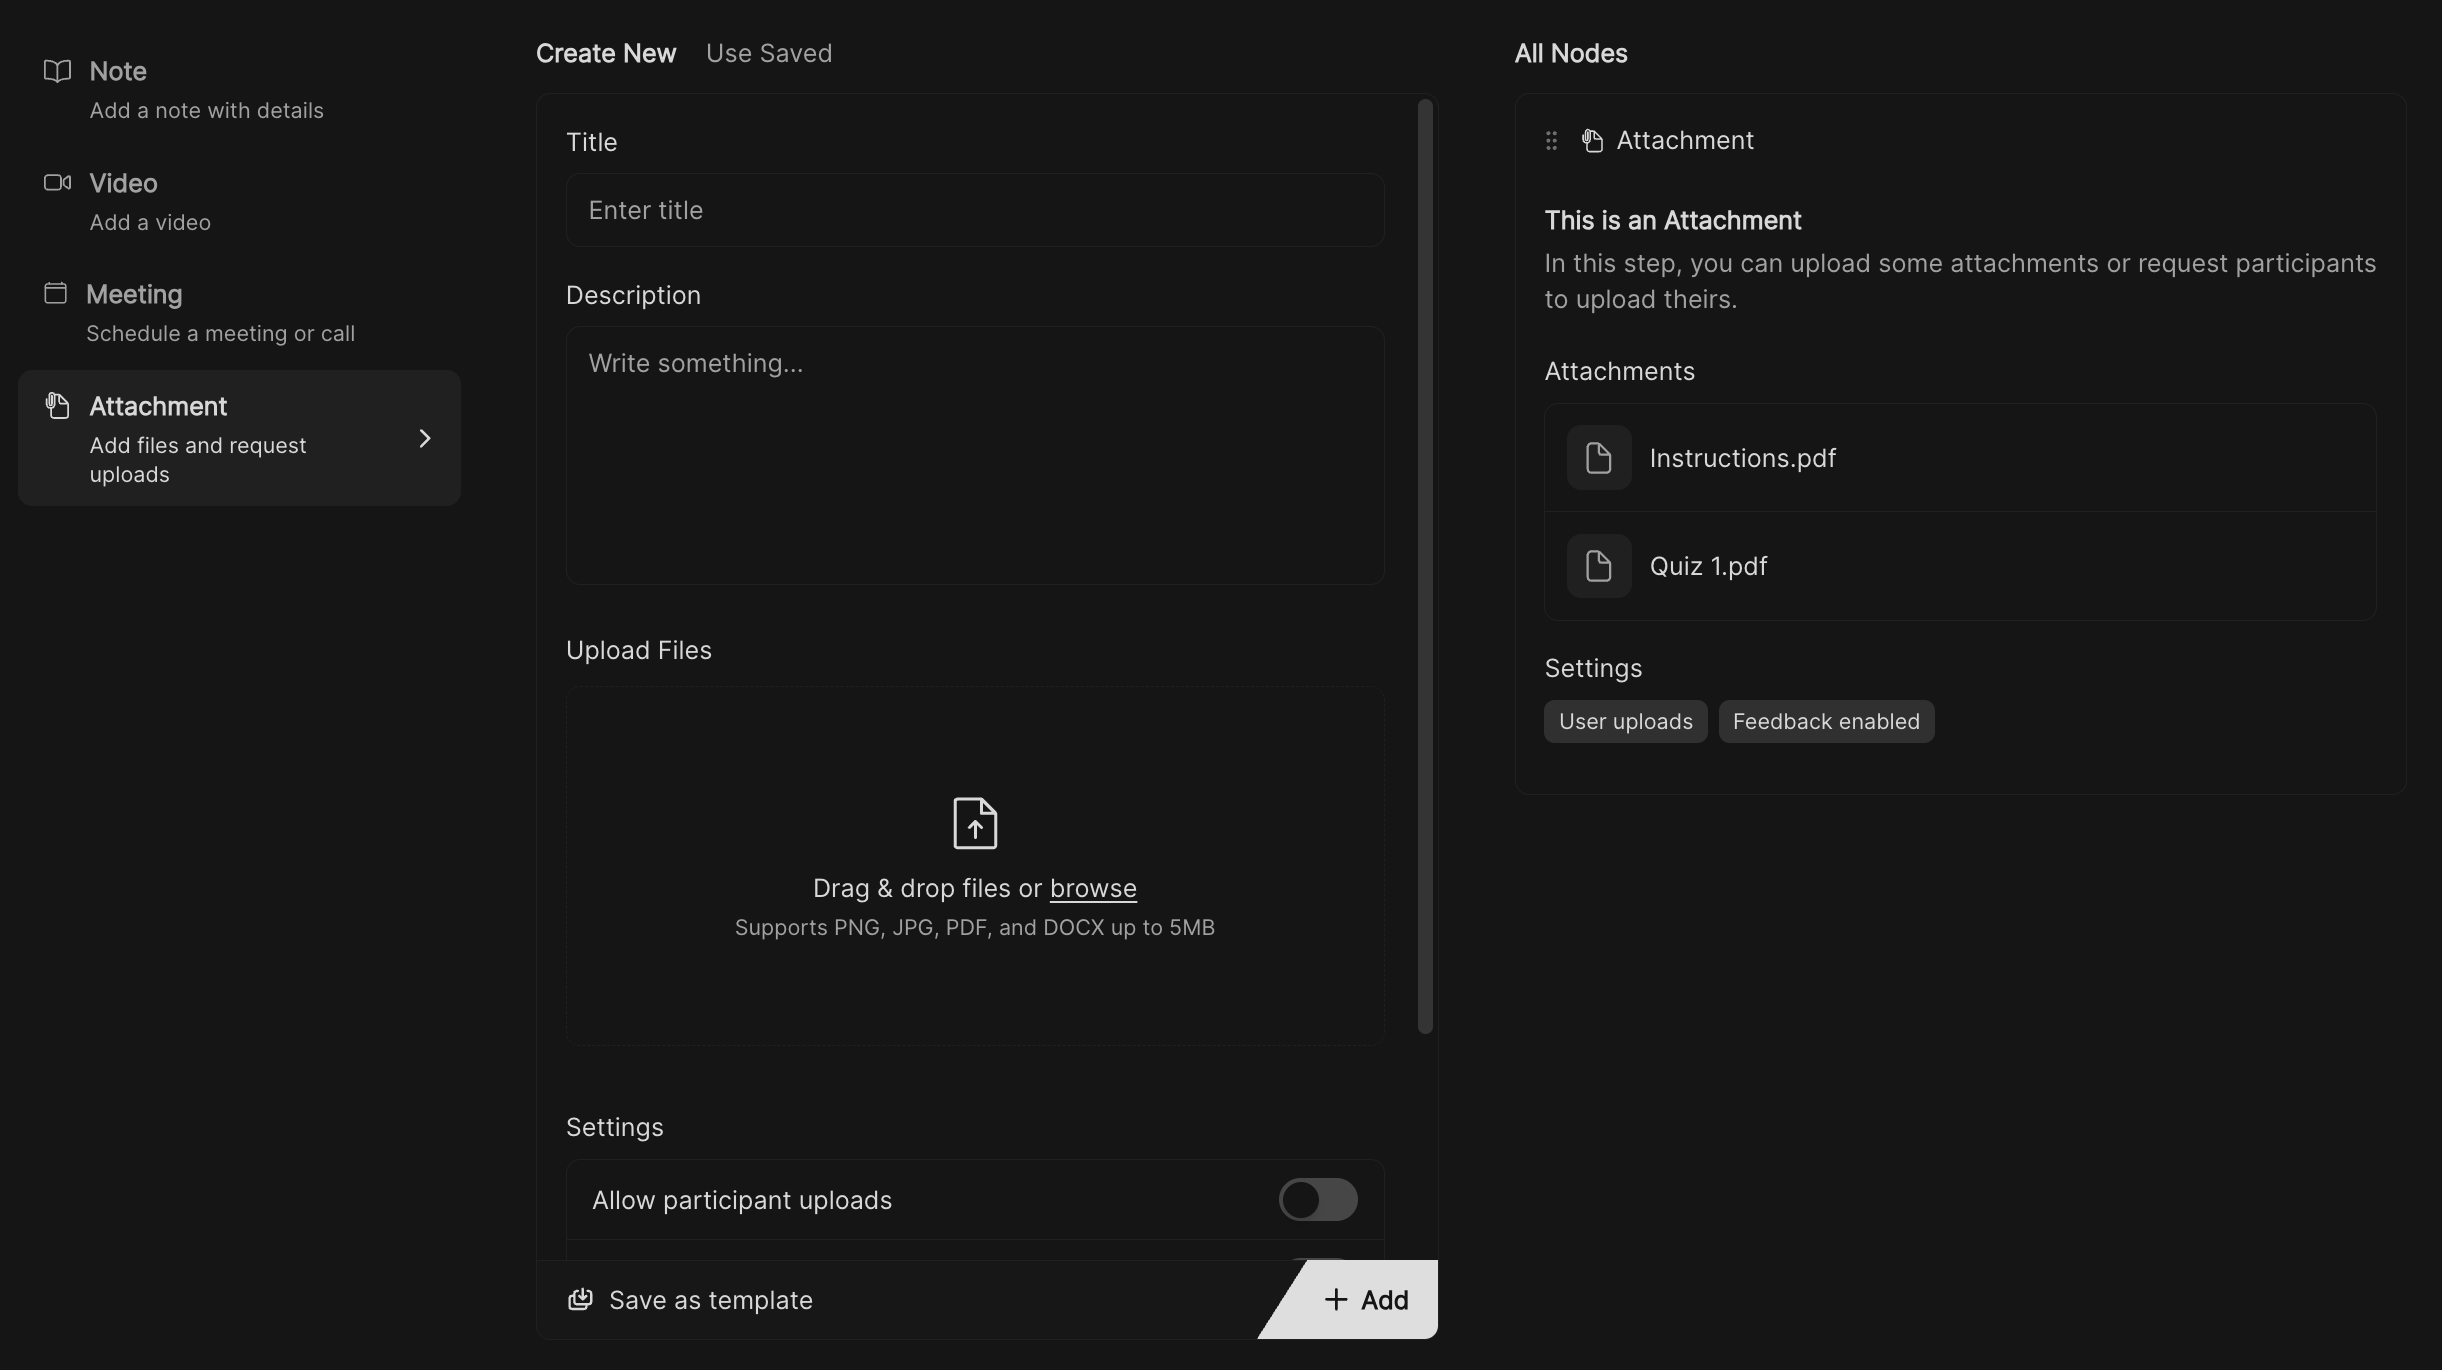
Creating an Attachment step
Write a description
Provide context or instructions for the attachment.
Example: Please review the document before the next session.
Example: Please review the document before the next session.
Upload files
Drag and drop files into the upload area or click to select from your computer.
Files must be 5MB or smaller.
Files must be 5MB or smaller.
Request user to upload (optional)
Toggle this option if you want participants to upload their own files as part of the workflow.
Example: Upload your signed agreement.
Example: Upload your signed agreement.
Enable additional options
- Allow receiving feedback – Collect comments on the uploaded file.
- Allow receiving rating – Let users rate the usefulness of the attachment.
- Hide in client view – Keep the attachment private to your team if needed.
Save the attachment step
Click Save this for later to add the attachment into the attachment templates list.
Best practices
- Use descriptive titles so users immediately know what the file is for.
- Request uploads only when necessary to reduce friction for clients.
- Hide internal files (like templates or internal docs) if they’re not meant for clients.
- Combine attachments with Notes or Tasks to provide extra instructions.